
Hip tile repair · 9 min read
Hip tiles: rebedding, hip irons and dry hip systems
Why the tiles on the sloping corners of a hipped roof slip, what rebedding involves, where hip irons and dry hip systems fit in, and how to judge a repair against a rebuild of the whole hip.
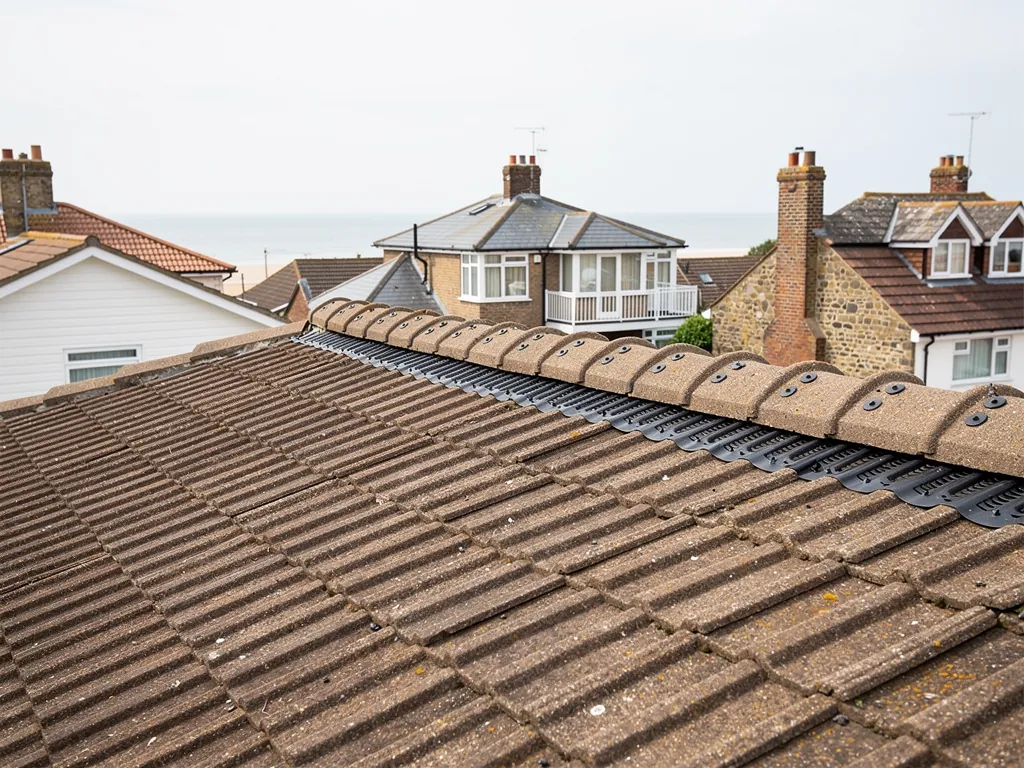
A hipped roof slopes on all sides instead of ending in a gable wall. A hip forms wherever two slopes meet in an outward corner, and it runs diagonally from the ridge to the eaves. Capping tiles cover that line, and they have a harder life than the ridge at the top. Gravity pulls them downhill, the slopes beneath them are steep, and the joints between them are open to driving rain.
Bungalows and chalet bungalows along this coast are often hipped, so a good share of the roofs we survey have hip tiles to look at. The common faults are cracked bedding, a hip tile that has crept down its neighbour, and a missing or rusty hip iron at the foot. All of them can be put right, but the right fix depends on how the hip was built in the first place.
This guide covers the parts of a hip, how they fail, how rebedding works, what a dry hip system changes and what the job costs in national terms. The verdict for your own roof comes from photographs taken on the survey, and the written price follows as one total.
Anatomy of a hip
The hip is the slanting line where two roof planes join at an outside angle. The tiles beneath it are cut to follow the angle, and the gap along the line is closed with capping tiles. These are either half-round, angled or, on clay roofs, bonnet-shaped, a style of hip tile with a rounded top that sits like a roofing hat over the join.
At the top, the hip meets the ridge. Depending on the roof, three or four lines can converge at that point, and the junction is one of the fiddliest details on a pitched roof. At the bottom, the hip finishes at the eaves with an end tile, sometimes a decorative one, and a metal bracket called a hip iron.
The hip iron is a strap of galvanised or stainless metal screwed to the hip rafter below the last tile. Its job is to stop the bottom hip tile sliding off. Every other hip tile above it leans on that one, so if the iron is missing or the fixing has pulled out, the whole run can creep downhill a little at a time.
Why the bed matters
On a traditional hip the capping sits on a bed of mortar laid along the join, with the tiles pushed into it. The bed does two things. It seals the gap between the capping and the roof tiles below, and it holds each capping in position against its neighbours. If the bed shrinks, cracks or washes away, the seal goes, and so does the grip.
Mortar is no longer trusted to do both jobs by itself. After the 2014 revision of BS 5534, a roofer working to the standard adds a screw, nail or clip to each cap instead of leaning on the cement. Our overview of hip irons covers that bracket in more detail.
How hip tiles fail
Hip tiles fail for a handful of reasons, and from the garden you can often tell which one. The faults below turn up most often when we look at a hipped roof.
The most obvious is a shift in the line. Instead of a smooth diagonal, you see steps, tiles that sit proud, or a gap where one cap has slid away from the next. That means the bed has gone and the weight of the upper tiles is acting on the lower ones. The tile at the bottom has probably lost its hip iron or the iron has loosened.
Next comes cracked or missing pointing along both sides of the capping. Mortar shrinks as it cures, flexes with temperature and takes in water through fine cracks. Once water is inside, it expands in cold weather and breaks the surface from within. Pieces of pointing end up in the gutter, which is often how the first sign reaches the homeowner.
A third fault sits at the top. The junction where the hip meets the ridge has several tiles cut to fit, and the gaps between them need a good bed of mortar or a purpose-made fitting. When this joint opens, rain tends to run down the inside of the hip and show up as a stain on the ceiling nearby.
When wind does the damage
Gales load the hip from the side. A tile that is only held by mortar and its weight can lift or rotate in a strong gust, and once one moves, its neighbours lose their support. Hips on lower-pitched bungalow roofs are worth checking after any hard blow. Marley points out that below 30 degrees the windward slope can be subject to severe suction.
Rebedding a hip in mortar
Rebedding is the traditional repair, and it suits a hip whose caps are healthy but whose bed has given up. The work follows a clear order.
First the capping tiles are lifted off and stacked in sequence, so they go back in the same order. Old mortar is chipped out from the line and from the edges of the roof tiles below, down to a clean surface. The hip iron is checked. A rusted or loose iron is replaced, and its fixing is made good into the hip rafter.
Then a new bed is laid. A mix with the right proportions of sand and cement, or a lime-based mix on an older roof, is trowelled along the join. Each cap is pressed down onto it and levelled by eye along the line so the hip runs straight. Excess is struck off and the joints are pointed.
The step that makes the repair meet today's standard is the mechanical fixing. Marley says bedded tiles and fittings should carry mechanical fixings, which is where BS 5534 points. Each cap is held with a screw or clip that fixes it to the roof structure, so the mortar seals but does not carry the load.
When rebedding is not enough
If the capping tiles are cracked, or if so many have gone that matching is difficult, a repair turns into a partial rebuild. A hip that has been rebedded several times by different people can carry layers of old mortar that never bond, and it is often quicker to strip the lot and start clean. Our guide on matching ridge tiles explains how to find a close colour and profile.
Dry hip systems
A dry hip system takes the mortar out. Each cap is fixed with a clip or bracket to a batten or rail running along the hip, and the joints are closed with a flexible sealing strip or a ventilated underlay instead of cement. The roof tiles on either side stay as they were.
The specification for these kits is BS 8612:2018, published on 31 January 2018, which Marley describes as the test specification for dry verge, hip and ridge systems. Having a standard behind the product means the kit has been tested, not just promoted.
There are practical advantages. A dry hip has no wet bed to shrink, crack or stain the roof tiles, so it can stay tight for much longer than a mortar bed that has been moving with each frost. The job can also be done in poor weather, because there is no mortar to wash out. And the kit is colour matched, which keeps the line neat from the road.
Where mortar still wins
On a period property, the rounded mortar line is part of the character, and bonnet hips on a clay roof look best when bedded. A listed building or a conservation-area home may need the traditional appearance kept, so the council's planning team is worth asking. In those cases the answer is often a bedded hip with mechanical fixings hidden in the joint, which keeps the look while meeting the standard.
It is also worth remembering that a dry system is only as good as the batten it is fixed to. If the hip rafter or batten has rotted, they have to be repaired first.
The repair-or-replace call
Not every hip needs a rebuild, and our advice is the smaller job whenever it will hold. The survey asks four questions of the hip.
Are the capping tiles sound? Cracked tiles cannot be rebedded. They need replacing, and matching them to the rest of the hip takes some searching on an older roof.
Is the structure underneath dry and firm? A soft hip rafter, a rotten batten or wet felt below the capping makes any repair temporary. The fix then reaches below the tiles, and the price changes with it.
Has the hip iron failed? A new bracket is a small job on its own, but it is also a symptom that the hip has been slipping. The tiles above it may need lifting and resetting.
Is the problem confined to the hip, or is it along the ridge and verge too? A roof with tired mortar everywhere is often better treated in one visit, because the scaffolding or tower is the largest cost and it is already up.
How the verdict reaches you
You get photographs of your own hip, showing the cracks, the gaps and the iron. The verdict names one option: a tidy of the pointing, rebedding with fixings, a dry hip, or a rebuild of the hip line. If the whole covering is tired, that goes in the report next to the smaller fix, so the choice stays yours.
Cost, access and what to ask
National guides give numbers for the nearest comparable work. Checkatrade puts ridge tile repairs at £50 to £70 per metre (June 2026 table), and its dry ridge guide prices each dry hip at £300 to £400 (September 2026). Neither is a repair rate for a mortar-bedded hip, and hips are priced by length in much the same way, but the bonnet style, the steepness and the number of hips on the roof all push the total. Treat them as a guide to the market, not your bill. Checkatrade says its figures exclude VAT, which is 20 per cent at the standard rate.
Access often decides the bill. A hip runs the full height of the slope. Checkatrade's October 2026 scaffolding table has a detached bungalow at £1,000 a month and a typical semi at £875. A tower or cherry picker is sometimes enough for a single hip, and the survey tells you which.
Questions that sort one quote from another
Ask whether each tile is being mechanically fixed, and how. Ask what happens to the hip iron. Ask whether scaffolding and VAT are in the price. Ask what the plan is if the batten below turns out to be rotten once the capping comes off. A good answer names the method, and a vague one is a warning.
Repairs this size rarely need a building control application. The Planning Portal puts the test at less than 25 per cent of the building envelope and less than 50 per cent of the roof affected, though Arun District Council lists re-covering among its approvals, so a larger rebuild is worth a call to the council or your building control body.
Work on the hip usually pairs well with a check of the neighbouring ridge. Our guide on the cost to repair ridge tiles breaks down what moves the figure, and the main ridge tile repairs page explains the wider service.
Questions
Hip tile questions
What is the metal strap at the bottom of a hip?
It is a hip iron: a galvanised or stainless bracket screwed to the hip rafter at the eaves. It stops the last tile sliding off the hip, and every tile above rests on that one. If it is missing, rusted or loose, the whole run can drift downhill.
Can one cracked hip tile be swapped on its own?
Often yes, if the neighbouring tiles and the bed are sound. The new cap is bedded and fixed with a screw or clip, and the difficulty is matching the colour and profile of an older tile. If several are cracked, it is usually more sensible to rebed the lot.
Is a dry hip system better than mortar?
It avoids a bed that can shrink and crack, and it is tested to BS 8612:2018. On an older clay roof, though, a bedded hip with hidden mechanical fixings may look right and perform well. The better option is the one that suits your roof and its condition.