
Spray foam survey · 9 min read
Spray foam surveys: what an inspection looks at
A spray foam survey is a close look at the foam, the timber beneath it and the roof above. Here is what an inspector checks, in what order, and what the report should tell you.
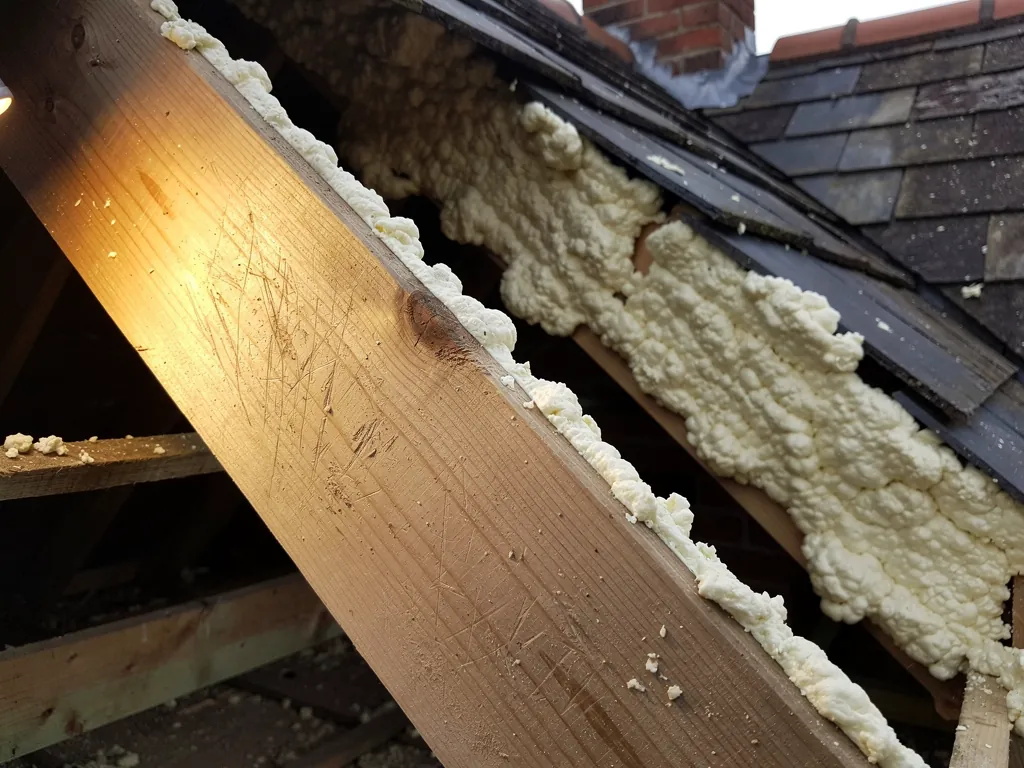
A survey is where a spray foam question turns from worry into information. Before it, you have a grey skin in the loft and a lot of conflicting advice. After it, you should have photographs, a plain account of what was found, and a recommendation: leave the foam, open it up in places, or take it out.
People ask for one for different reasons. A buyer wants to know what they are taking on. A seller has been told by a buyer's surveyor that the roof could not be inspected. An owner has noticed a damp smell, a ceiling stain or a letter from a lender. Whatever the reason, the questions underneath are the same: what is the foam, what is it hiding, and what does the roof need?
This guide walks through an inspection in the order it is carried out, from the loft hatch to the written report. It is part of our spray foam insulation removal work, and the pictures taken on the visit arrive with a written quote giving one total.
Who asks for a survey and why
There are three common starting points, and they shape what the inspection concentrates on.
The first is a purchase. A buyer's general survey flags foam and says the roof timbers could not be seen. The buyer, or their lender, wants a specialist to look properly. The second is a sale. A seller who knows about foam, or who has had a buyer walk away over it, wants a record that will stand up to a surveyor and a valuer. The third is ownership: someone living with foam who has started to wonder about it after a leak, a damp smell or news about lenders and foam.
The RICS background
The RICS spray foam guide for consumers (March 2023) sets out how surveyors and valuers approach foam in a loft. It cautions about damp from badly fitted insulation, uncontrolled condensation among it, says foam may colour a valuer's view of the house, and tells owners to ask their mortgage provider where it stands. A survey of the roof is the practical answer to those cautions, because it replaces assumptions with a record.
It helps to be clear on what a roofer's survey is and is not. It is an inspection of the roof structure and the foam, carried out by someone who works on roofs every week. It is not a valuation, and it is not a mortgage valuer's report. It produces the evidence that a valuer, a buyer or a lender may ask to see, and the facts you need before choosing what happens to the foam.
Tell us at the outset why you want it, and what deadline you are working to, so the inspection can be planned around the sale or the lender's request.
From the hatch: what the foam itself shows
The inspection starts at the loft hatch, with a torch and a camera, before anyone steps into the roof space. From there the foam can be seen in general, and the first set of observations is about the foam itself.
The inspector notes the type. Open-cell foam is pale, soft and sponge-like. Closed-cell foam is firmer, denser and often a stronger yellow or tan, and it resists a thumbnail. Photographs of both a clean-cut edge and a surface patch are useful, since the surface can look different from the interior.
Thickness comes next, measured where the foam can be reached, usually at the edges and around the hatch. The coverage matters too: whether it runs the full slope, stops short at the eaves, or has been sprayed only across part of the roof. Foam that stops at the wall plate leaves a different ventilation picture from foam that runs right down to the soffit.
Everything the foam has covered
A fair amount tends to end up under foam by accident. The inspector looks for cables, light fittings, pipework, the cold water tank and extract ducts that have been sprayed over. Some of these are a safety question as much as a roofing one, and if a cable is buried in foam, the right step is to say so in the report and suggest an electrician look at it.
The inspector also looks at the gable ends and the party wall, the edges of the hatch, and any boarding that has been laid. Gaps, shrinkage cracks and areas where the foam has lifted from the timber are noted, since these point to where moisture might have found its way in.
Looking for signs of moisture
With the foam understood, the inspector turns to the question that matters most: has water been at work here? The signs are often indirect, so the search is patient.
Smell is the first. A musty, damp or earthy odour in a loft that was clean when the foam went in is a signal worth recording. Next come stains on the foam or on exposed timber at its edges: tide-marks, dark patches, or rust marks where nails pass through. Mould growth, whether black, green or white bloom, is photographed and its position noted.
The ceilings below get a look as well, from the rooms. A brown ring on the plasterboard, a patch of flaking paint or a hairline crack that follows a rafter line can point to a leak from above. The inspector asks whether the stain is new, old, or has been painted over.
The felt and tile backs
Where the underlay is visible at eaves level or through gaps, its condition tells a story. Torn, brittle or stuck felt suggests either age or a leak. Daylight visible between tiles where it should not be points to a covering that has slipped. Dampness on the back of tiles, in the form of dark patches or a green film, shows that water has passed through.
Energy Saving Trust advice, updated on 8 May 2026, is against putting foam onto a roof that leaks. That is why a leak history is part of the questions put to the owner. If the roof was already letting water in when the foam went on, the inspector probes more points and the odds of a longer job rise.
Absence of signs is recorded as carefully as their presence. A loft with no smell, no stain and dry nail heads is a good sign, though it is not proof, and the next stage exists to test it.
Testing the timber: probe, meter and a small opening
Only the timber can settle the question, so a spray foam survey ends up there. How far the inspector can go depends on what the owner agrees to, and on the access.
Where bare wood is exposed beside the foam, as it often is near the eaves and the gable, it is probed directly. A probe is a blunt metal point pushed into the wood. Sound timber resists; decayed timber lets it sink. A moisture meter may also be used on any bare surface. It gives a reading that can be compared with other rafters, and with a known dry piece, though it is an indicator, not a verdict.
Opening up the foam
Readings through foam are of limited value, so where an owner agrees, the inspector can cut small windows in the foam by hand to expose the rafter faces. Spots are picked on the evidence: under valleys and chimney stacks, beside a ceiling stain, near the eaves and on the slope that gets the worst weather. Each window is photographed, probed and logged with its position.
The RICS guide says that removing foam could potentially damage the structure, so the cuts are small, careful and made good. If the first windows show dry, firm wood, the survey may conclude that the foam can stay. If they show staining or softness, more windows are opened until the extent of the problem is clear.
Owners sometimes hesitate over cutting into foam they paid for. It helps to look at it this way: a few small openings give you real information, where a survey without them can only repeat the line that the roof could not be inspected. Our guide to whether spray foam damages roof timbers describes what the openings reveal.
The outside of the roof and the air paths
A foamed roof cannot be judged from the inside alone. A survey that stays in the loft misses the cause of any damp, because the cause is usually on the outside or at the edges.
So the inspector studies the roof from the ground, using binoculars or a camera on a pole, and from a ladder where that is safe. Tiles or slates are checked for movement and breaks, the ridge and hips for capping that has worked loose, the verges for tired edge detail, and the flashings around chimneys, dormers, valleys and abutments. Gutters and downpipes are looked at as well, because an overflowing gutter wets the eaves timbers.
Ventilation and condensation risk
With foam, the question of air movement changes. A traditional cold roof relies on air entering at the eaves and leaving at the ridge. Foam applied to the underside of the roof often changes the roof into a different build-up, and the vents that used to matter may be blocked, sealed or no longer needed. The inspector notes where vents exist, whether foam has covered them, and whether the arrangement looks consistent.
The inspector also asks about the house: bathroom and kitchen extraction, whether it vents to the outside or into the loft, and how the home is heated. Steam from cooking and washing needs an outlet, and if it finds none it rises into the roof, where cold surfaces turn it back into water.
All of these observations are put together before any recommendation is made, so that the advice reflects the roof as a whole.
The report and the recommendation
A survey is only as useful as what you can do with it, so the report has a job to do. It should be written, clear, and illustrated with dated photographs that a person who has never seen your loft could follow.
It should say what the foam is and where it runs. It should describe what was seen on the timber, which rafters were probed or opened, and what each showed. It should note the state of the covering and flashings outside, the ventilation and any services buried in foam. And it should be clear about its limits, naming any area that could not be reached or checked.
The plain verdict
At the end comes the recommendation, and it should be one of a small number of outcomes. Leave the foam, with a record to show buyers and lenders. Open it up in certain places, repairing what is found there. Or remove it, by the loft route or by lifting the covering. The reasoning should be given, in photographs, not just stated. Our own approach is to propose the least work that fully cures the fault, and removal is not pushed where the evidence supports leaving the foam alone.
The route recommended gets a written quote with one total at the end of it, and how that work runs is covered in the spray foam removal process.
Using the report
Keep the report with the deeds or in the house file. A buyer's conveyancer, a lender's valuer or a later owner can then see that the roof was examined, what was found and what was done. If the house is going on the market, our guide to selling a house with spray foam insulation explains how to use it.
Questions
Spray foam survey questions
How long does a spray foam inspection take?
Time on site turns on how big the roof is and whether openings are cut in the foam. A look from the hatch with photographs is quicker than a visit with several windows cut, probed and logged. We agree the plan with you first, and the written quote follows, as one total price.
Will the surveyor have to damage the foam?
Only if you agree, and only in small, chosen spots. Where bare timber shows at the edges, it can be probed with no cutting at all. Where it does not, small hand-cut windows give far better information than readings through the foam, and they are made good afterwards.
Is a roofer's survey enough for a lender?
It may be, but the lender decides. Lender policy varies, and the foam can be a sticking point with some of them. A dated photographic report of the rafters gives a valuer something concrete, and your broker or conveyancer can tell you what that lender wants.